
Plastic Mold Build Walk-through
Have you ever wanted to know what happens after you sign the contract to build your first plastic mold? Let’s go through it step-by-step with a plastic mold build walk-through.
The Quote
Based on your DFM CAD and PRD (product requirements document), which includes the specific material type to be used in producing your parts, the mold maker will work up a quote for making your tooling.
As discussed in earlier blog posts, they may quote you many different plastic mold configurations. You need to consider each one and discuss it with your mold maker to reach the combination that best balances your investment in tooling with the per-piece price that you will pay the manufacturer to produce the parts with your tooling.
*Note: The tooling should belong to you, the owner of the product idea, so make sure the contract clearly grants you that ownership. This keeps the ball in your court, so to speak. You need to establish a solid relationship with your manufacturer to keep the production flowing and your customers happy. If you don’t own your tooling, you may be forced to stay in a dysfunctional relationship with your manufacturer or start from zero with a new one.
The Terms
Below are common payment terms and fine-print information typically included in tooling agreements, as well as some explanation for how important they are to a successful tool build.
50-40-10
This is the most common term structure, and it indicates the following:
- 50 percent with order: This gets the process started and buys the raw materials to build the mold.
- 40 percent within seven days of T1 sample submission: After the basic construction of your mold is ready and tested, you will receive samples of the parts, a phase called Test 1 or T1. These samples are not cosmetically perfect but are intended for the customer to get an idea of where the mold maker is in the process and to check the dimensions of the parts. Within seven days of receiving these samples, the customer will pay 40 percent.
- 10 percent within seven days of final mold approval (prior to shipment): After discussing final adjustments to the mold and revising and approving the final, perfect samples, you must pay the last 10 percent before the mold will be shipped to your desired location. Please note that your quote’s payment terms should include the words “DDP”(Delivery Duty Paid) or “FOB (Freight on Board) [your desired destination].” This will insure that the mold prices include duties, taxes, and shipping costs from the mold maker to either the manufacturer or wherever you want to have the molds sent.
50-50
This indicates a 50 percent down payment and 50 percent after you approve the final samples. The mold maker probably won’t send T1 samples but will wait until the mold is near completion and the samples are nearly perfect. The downside to this is that you will both be relying on the minute details of your DFM. One small error and the mold maker may have to remove texture or make other changes that may be costly to you.
30-40-30
Usually, this means 30 percent down, 40 percent after T1 sample approval or submission, and 30 percent after you’ve approved the final mold sample but before shipping.
Important: Even though the terms may state “sample approval,” that doesn’t mean you will be able to order changes to the mold or parts simply because you don’t approve. Remember, the mold maker is cutting steel and building a complicated tool based on your designs. An injection mold should be guaranteed to efficiently make parts that meet your dimensions and designs. If you left something out or made an error, expect additional costs to make the necessary fixes—and note that it can be very expensive to make changes at this stage.
This, of course, is painful for plastic mold makers also. They take great pride in their work and may feel that you are butchering their masterpiece. Clear and consistent communication with your DFM engineer and high-quality prototypes made before you order your molds (as we’ve advised in so many other articles) will help you avoid conflicts and added costs.
Plastic Mold Design

Plastic Mold Schedule
After receiving your down payment, the mold engineers will start designing the details of your mold. First, they should do a basic “moldability” review and send a list of concerns. They will submit images of the mold design for approval by the customer, the manufacturer, and the customer’s engineer.
These images will include CAD drawings of the mold’s construction and mold-flow analysis. All parties need to participate in discussing these designs and ask questions about different aspects of the design. We keep beating this poor, dead horse, but communication will always help avoid headaches, added costs, and conflicts down the road.
Material Purchasing
 After you, the customer, have approved the mold designs, the mold maker will acquire the basic raw materials and components to build your mold. Often, but not always, the mold maker will take the time to send you photos of these materials and submit a production schedule.
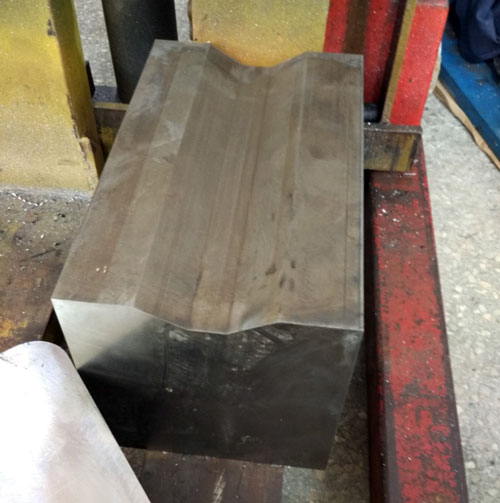
Production
Now the real work begins. The cores, cavities, and plates will be drilled and milled, refined through EDM, and polished. This step usually takes from 30 to 45 days to complete.
Assembly
After all the parts of your plastic mold have been cut to size and polished, they will come together in the first assembly.
T1
Test 1 is the very first time your baby will be put into an injection molding machine and sampled. If the mold maker believes that the dimensions match your CAD drawings, they will send you the samples for review.
The mold maker should provide videos of your mold running in the machine. Also, they should provide the exact setup parameters and materials used to make your samples. These may be used by the molder to expedite the setup of your mold once it arrives or to find any errors or flaws in the process that may be causing flaws in the sample parts.
T2
This and any further tests will be for the purpose of making small cosmetic adjustments before the final mold is made and shipped.
Shipping
A mold maker will usually give you two shipping options: sea or air. If the mold maker is domestic, they will usually ship the tool by LTL 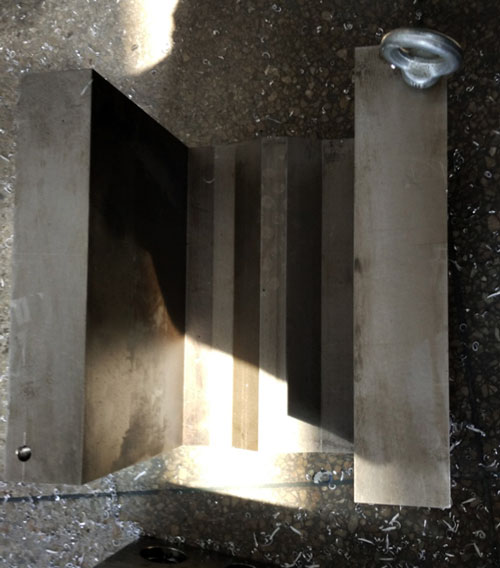 (less-than-truckload) freight.
A mold coming from China or elsewhere in East Asia will usually take 30 to 45 days to reach its destination. This is the most economical choice for shipping but does require some patience.
Shipping a mold via air freight from East Asia takes only about a week but costs substantially more. Time is money. Depending on your schedule, the extra costs might be worth the time saved.
Mold Proofing
After your plastic mold arrives at the injection molding facility, the next molder will prepare to set up and optimize the process for your mold.
Proofing a mold is sometimes a matter of hours, sometimes days or even weeks. It all depends on the complexity of your mold and the parts it will make.
Remember that to proof your mold, the injection molders have to schedule machine time, dry or otherwise prepare your raw material, and install and set up your mold. Again, setting up a manufacturing process like injection molding requires time and patience. As molders, we will always do anything we can to help a customer, but we are limited by the laws of time and space.
Final Thoughts
Building a plastic injection mold is complicated, expensive, and time consuming, but the long-term benefits to getting it right the first time are invaluable.
Knowing what to expect before getting started will help you, the mold maker, and the injection molder communicate clearly and make your project a winner.
Jason Post
Director of Business Development